Customizing the Table View
Ron is not satisfied with the default setting of the columns displayed in the job overview. He wants to add more columns to the view and delete a little-needed column.
If you want to change the columns of the tabular view in the job overview, please note that doing so may have different effects on the display with other filters depending on the filter type:
|
Filter used while making the change |
Effect |
|---|---|
|
|
Your change is applied to all the standard filters. For public filters, the change is applied if the table for the filter was not changed previously. |
|
|
Your change is applied only for the public filter. Future changes to the standard filter have no effects on the view with this public filter. |
|
|
Your change is applied only for the private filter. |
This applies to the selection of displayed columns as well as to the selected column width.
-
Select the filter function you want to use for the table.
The overview is reloaded.
-
Note the explanations in the table above.
-
In the header area of the overview, click on .
A drop-down list appears in which you can access all the variables used:
-
System: You can select the number of sub-jobs belonging to the job or the name of the parent job.
-
General: You can select any of the variables that have been flagged as “for all types.”

Note
Selectable variables must have been defined during the type configuration by the responsible person (key user or administrator) with the checkbox For all types activated.
-
You will find all other existing job types listed below General. These can also be expanded individually to gain access to the job variables. You can select the information (variables) belonging to the job or process by selecting and expanding a type.
-
-
Click on the variable that you want to display in the table.
-
If necessary, click on other variables if you want to add more columns.

The new columns are displayed in the table.
-
Select the filter for which you want to change the table.
-
Note the explanations in the table above.
The overview is reloaded.
-
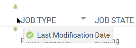
Set the cursor on the header of the table.
A down arrow will now appear in the cell on the right.
-
Navigate to ▾ > Columns.
-
Deactivate the checkboxes at the columns that you want to remove.
A drop-down list with all the columns in the table is displayed.
The columns are removed.
You can also change the order of individual columns by moving individual columns to the left or right.
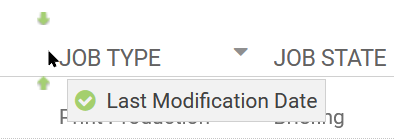
-
Use the mouse to click on and hold the column header of the column you want to reorder.
-
Drag and drop the column to the left or right.
A green indicator shows where you can release the column.
-
Release the mouse button and the column will snap to the new position.
You have reordered the column view.